Tutorial: Batch Processing
This tutorial describes how to use the Batch Processing
feature of Total Recorder (available only in the Professional, VideoPro and Developer Editions).
Batch processing can process one or more files and take the following actions:
- Change the format of audio files (Batch converter)
- Normalize audio data
- Apply Fade In/Out effects
- Repair MP3 files
- Split files
- Reduce pauses
- Edit or create tags for audio files (Batch tag editor)
- Create file names using tag information (MP3 and others) or sequential numbers
- Change playback speed
- Perform additional processing supported by add-ons
To process audio files in batch, take the following steps:
- Open the Tools-> Batch Processing
menu or press the
 button on the main toolbar. This launches the Batch
Processing dialog:
button on the main toolbar. This launches the Batch
Processing dialog:
-
Select either the Folder
option (if the files that you are going to process are in a
folder – with or without subfolders) or the Playlist
option (if the files are included in a playlist). Select the
source folder or playlist (M3U, PLS, and WPL playlists are supported).
-
The Source Files table will
be populated with the list of files available for batch processing
in the selected folder/playlist.
-
Look through the different properties of
these files (date modified, size in bytes, duration, format,
artist, title, etc.).
-
Check the boxes in the first column to mark
the files you want to process..
-
Click the Process button
to launch the first page of the Batch Processing Wizard
that will guide you through the next steps:
-
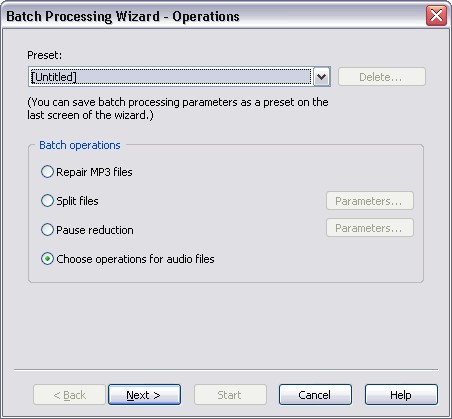
At the first step, you can do the following:
-
Choose the operations to be performed as
part of the batch process. You can choose one or more of the
following options:
- Change format to – convert the format
of the marked files.
- Normalize – normalize the marked files.
- Fade In/Out – apply Fade In/Out effects
to the marked files.
-
Preserve original file tag
– If the file type does not change, the tags are transferred
without any changes.
– If the file type changes, the tag fields are transferred
as completely as the original and resulting formats allow.
-
Use this file tag – let you change the tags in the resulting files.
Click the Tag button to specify the file
tag.
-
Apply add-ons –
list the Total Recorder add-ons you have installed. To apply
an add-on to the original files, select it from the list.
Check the boxes in the first column and specify the parameters
for the add-on.
- After you have selected the operations you want to apply to
the selected files, click Next to go to the next
page of the Batch Processing Wizard, Choose Destination:
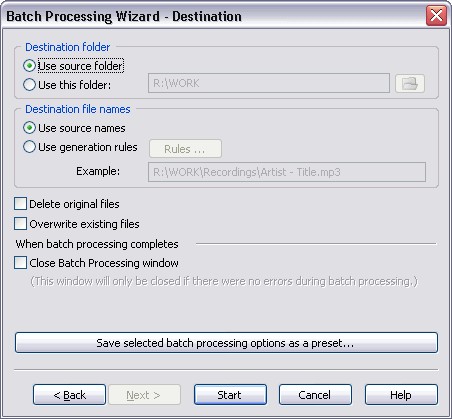
- In this page, you can choose the location and names for the
processed files. In addition to this, you can set the following
options:
-
Delete original files
– delete each original file after it is processed (not
recommended). It is advised that you delete original files
only after a thorough check of the files processed, especially
when you use complex processing that may lead to a loss of
quality such as when processing with an add-on.
- Overwrite existing files – rewrite
files that already exist.
- Close Batch Processing window when operation completes
– select this check box if you want the Batch Processing
window to be closed when processing completes successfully.
- If you want to save your selected parameters as a preset click
Save selected batch processing options as a preset
button.
- Click Start to process the marked files. After
clicking Start, the process begins, and the dialog
of long operations appears:
If necessary, you can stop the process and the files being processed will remain unchanged.
Notes:
– When you click Start, all the parameters that you have specified are saved and used as the batch parameters the next time you launch the Batch Processing Wizard.
– Batch processing can be launched through command line parameters (see Total Recorder Help, Using Total Recorder -> Automatic Playing and Recording: Scheduler, Command Line -> Using the Command Line). You can, for example, perform additional processing on recorded files using Total Recorder's scheduler.